Build Your DMARC Record in 15 Minutes

Why Email Authentication
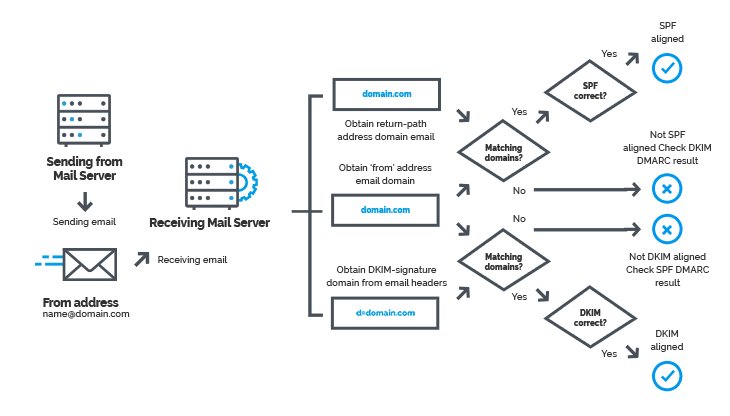
Email Authentication is a necessity today in order to help protect a domain used for delivering email, as well as to assure that any email recipients and senders are protected from forged (spoofed) and phishing email that might be targeting your domain. Email Authentication also helps gain control over where the domain is being used, and from what servers email is being sent from.
To learn more, there are now lots of website and YouTube videos you can seek out. There are also tools that have emerged out of this new solution, being first introduced in 2013. For instance, see Why DMARC? Also, visit DMARC.org.
Our usage and implementation of DKIM/DMAC/SPF is what we believe to be "best practices", but staying on top of the technology is certainly challenging. The best thing we can do for our clients is to recommend what we believe is the best solution, so below you'll learn how we do this work on this page.
You need to set up DKIM and SPF records at the domain's register. Then reporting is the area that DMARC is engaged in, requiring a third record in the DNS for the domain. It is this reporting and what you do with it as an email manager that becomes so important.
Domain Key Identified Mail (DKIM) Set-up Instructions:
Below are instructions on how to get this important authentication mechanism (DKIM) set up. It requires adding 3 DNS records to the domain's DNS records. These records all work together to provide the best protection. The order of which record to set up first has become less important, but you may find (depending on the speed of the registrar's propagation) that the SPF and DMARC records need to be set up first in the DNS and have finished propagation, before enabling DKIM. Therefore, these instructions are given in the following order.
The records you need to add to the DNS will all be TXT (short for TEXT) records:
- - SPF
- - DMARC
- - DKIM
You can use website tools such as https://whatsmydns.net or network-tools.com to check your domain's DNS records for propagation. Typically, it will take a couple of minutes to a couple of hours, and on rare occasions, between 24 and 48 hours for changes to DNS records to fully propagate on the Internet. Some DNS hosts can update changes very rapidly.
You Must Have Access to the Domain's DNS:
In order to put this records in the domain's DNS, you must have access and be able to log into the domain's registrar (ie. Network Solutions) where the domain's DNS records reside, to add the following DNS records.
__________________________________
NOTE: You can go to https://whois.icann.org/en to find where the domain is registered. This, however, does not necessarily mean that the DNS records are located here. You can't easily identify where the records are actually located. If you are experienced enough in knowing all the server addresses, you can go to https://www.whatsmydns.net and search for C-Name. If you know how to recognize the servers, then this is one way. In any event, the client should know where their DNS records are hosted, and so they will need to provide the login credentials for their registrar. Simply ask Click IT management where the client's domain is hosted. If the client's website is hosted and managed by http://clickithosting.com, you need to know something further in order to find, add and edit the DNS records. Many Click IT email client's domains are in their individually hosted accounts at http://clickithosting.com. If the customer is subscribed to our Security and Maintenance package, then it is more likely that their domain's DNS records are at CloudFlare. If the client has a website hosted and managed by Click IT, it is likely that the DNS records are hosted at CloudFlare. For customer not under our Website Security and Maintenance program (referred to as "S&M" or "Website Care"), but where their website is still at Click IT Hosting, simple get "delegate access" to the Click IT Hosting's main account and follow these instructions below.
Below is an example of accessing the domain's DNS, when the domain is hosted by Click IT Hosting.
To access a domain's DNS for clients hosted by Click IT (but not in our S&M program), log into your Click IT Hosting account (which is necessary to have) and follow these steps:
- Log into your Click IT Hosting account.
- Go to "Account Settings"
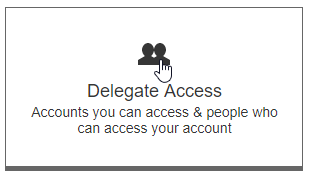
- Go to "Delegate Access"
- In the left-hand column is a list of Click IT's hosted accounts.


If the DNS is on CloudFlare, you'll need to ask Click IT management for access.
__________________________________________________________
Once you know you have access to the domain's DNS, and can enter a record, follow the three steps below:
A) STEP 1 - SPF:
-
Setup Your SPF Record
=====================
To have an SPF record implemented, add the following TXT record to your DNS:
Hostname: CLIENTDOMAIN.com (some DNS providers require just the "@" here)
Time to live (TTL): lowest possible
Record type: TXT
Value: v=spf1 include:emailsrvr.com include:spf.constantcontact.com ~all
You must include in the statement EVERY SERVER that serves email for this domain.
*IMPORTANT: If you utilize other authorized sending servers (i.e. specialized bulk mailing services (such as Sendgrid, MailChimp, Constant Contact, etc..), a web server that sends email from your domain, or some other non-CP email provider) you will need to contact that provide for the additional information (their IP address(es) or hostnames) needed to add in to complete your SPF record. This will help mitigate any potential errors with your email delivery.*
Example: v=spf1 include:emailsrvr.com include:spf.constantcontact.com include:amazonses.com include:_spf.atlassian.net include:spf.mailjet.com include:aspmx.l.google.com include:orion.managewp.com include:secureserver.net include:servers.mcsv.net include:_spf.google.com ~all
Difference between a Tilda (~) and a Minus (-) symbol:
The Tilda(~) is a soft fail
The Minus (-) is a hard fail
Servers are in this example as follows:
- include:emailsrvr.com - CP - RackSpace
- include:spf.constantcontact.com - Constant Contact
- include:amazonses.com - Amazon SES
- include:_spf.atlassian.net - JIRA / Atlassian
- include:spf.mailjet.com - Mail Jet
- include:secureserver.net - GoDaddy, Click IT Hosting
- include:servers.mcsv.net - MailChimp
- include:_spf.google.com - G-Mail/Google
Note: Don't forget to include an SPF record for the website hosting company which will relay the SMTP mailed forms from the website.
NOTE: Every time a client adds an approved mail server for their mail, the need to notify us at Click IT so we can include the server as an approved mail server by adding it to the SPF record.
When all the servers have been added to the SPF record as illustrated above, it means only those servers are authorized to send mail for CLIENTDOMAIN. All others would be neutral (?all) simply because there is no current SPF for the domain. Any other servers sending for CLIENTDOMAIN.com should be semantically the same as the current settings.
----------
Now it's time to set up your DMARC record.
========================
B) STEP 2 - DMARC Policy Enforcement:
The record below starts you off with a "Reporting-only" DMARC policy. We highly advise setting up your DMARC policy to report-only prior to setting up any enforcement. DMARC instructs anyone who receives an email for CLIENTDOMAIN.com to send reports to a specified address. It will be up to you to monitor and view the reports before changing the policy to quarantine or reject. The first time you enter this record, you will need to set this P value to "None". Have all client reports we are setting DKIM up for go to dkimreport@clickitco.com.
In the Value field, please specify an email address to receive the daily DMARC reporting. You can set up your DMARC signature as follows:
Hostname: _dmarc.CLIENTDOMAIN.com
Time to live (TTL): lowest possible
Record type: TXT
Value: v=DMARC1; p=none; rua=mailto:YOUR-CHOSEN-EMAIL@ANY-DOMAIN-DETERMINED.COM
Example: v=DMARC1; p=none; rua=mailto:dkimreport@clickitco.com

(dikmreport@clickitco.com is used because it is a distribution alias where those responsible for this work are sent the DMARC reports.)
We also recommend using an aggregator to help filter the content of these emails that will be returned. The top reporting aggregators we have found are:
- dmarcian (http://dmarcian.com)
- 250OK (http://250OK.com)
- Agari (http://agari.com)
This is based on our experience and based on suggestions from https://dmarc.org/resources/products-and-services/
Also, TO LEARN MORE, you'll need to read this helpful post about how to read the DMARC aggregate reports so that you can understand what is happening to your email:
https://blog.returnpath.com/how-to-read-your-first-dmarc-reports-part-1/
C) STEP 3 - DKIM:
Below are instructions from RackSpace regarding enabling and getting the DKIM signature you will need. Since we are a reseller of RackSpace email, this information for those emails hosted there is most useful.
1) Enable DKIM in the Cloud Office Control Panel:
DomainKeys identified mail (DKIM) adds a secure signature to your domain to authenticate email sent from users in your company. DKIM is an industry best practice that increases the security of your email domains.
a) Prerequisites:
- Applies to: Administrator
- Difficulty: Easy
- Time needed: Approximately 15 minutes to create record, 24-48 hours for the record to propagate
- Tools required: DNS host administrator access
For more information on prerequisite terminology, see Cloud Office support terminology.
Before enabling DKIM, we recommend you create a robust email verification policy by completing the steps in the following articles:
- Create an SPF record policy.
- Create a DKIM record.
- Create a DMARC record policy.
For a video tutorial of the following steps, see Rackspace Email - DMARC / DKIM: What It Is & How to Setup.
b) Enable DKIM for a domain:
- Log in to the Cloud Office Control Panel, and perform the following steps:
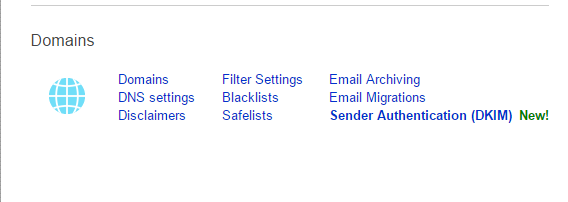
- In the Domains section of the home page, click the Sender Authentication (DKIM) link.
- On the Sender Authentication (DKIM) page, click the domain for which you want to enable DKIM.
- Click the Enable DKIM for button.
 If your domain’s DNS is managed through your Cloud Office Control Panel, then DKIM enabling is automatic.
- If your domain’s DNS is managed through another service, then you are given the DNS key and value information to add a new TXT record. See the documentation of your DNS hosting provider for instructions on adding a new TXT record for your domain. If you do not know where your DNS is hosted, see Find your DNS host.
- Note: When entering the "Selector" value as the "Host" in the TXT record in the DNS, you need to add the following"._domainkey".
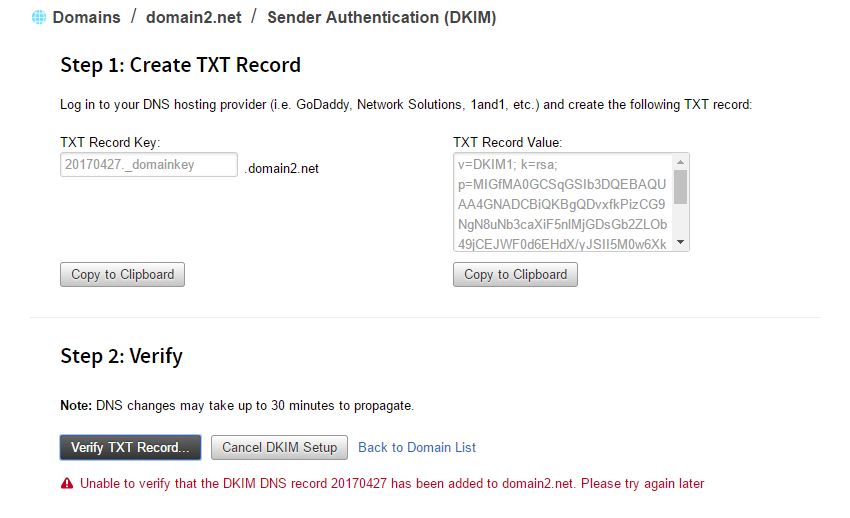
c) DKIM Example:
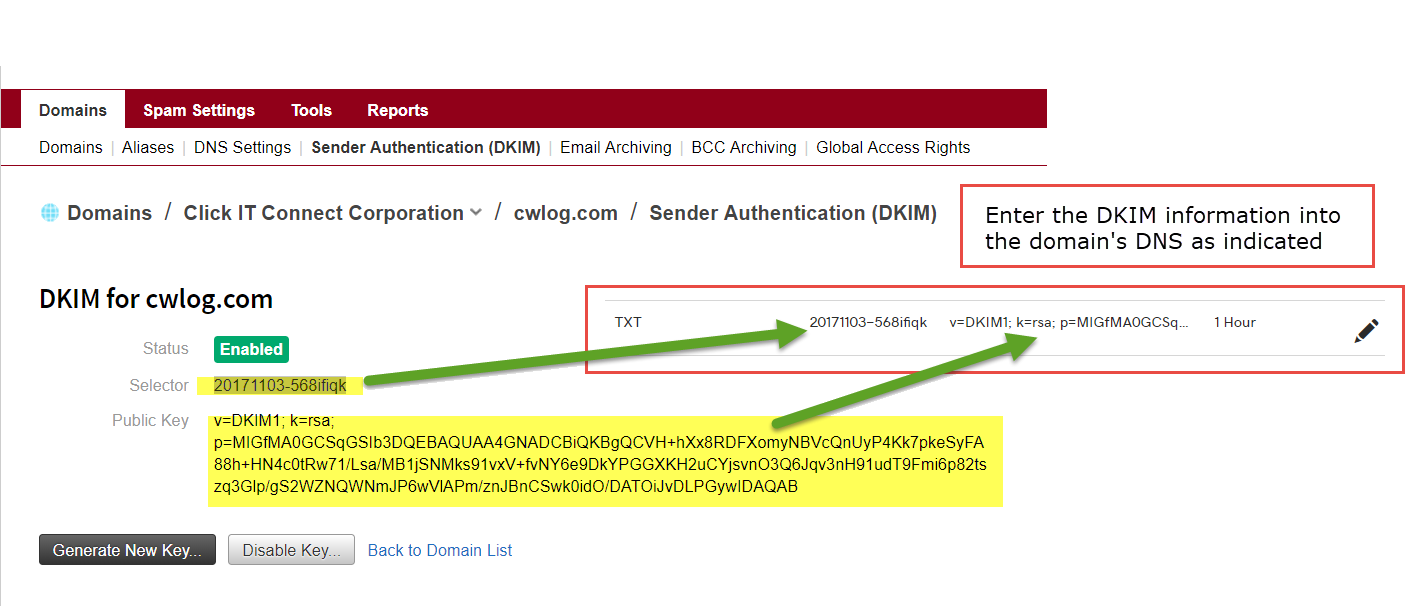
D) STEP 4 - Verification:
- After adding the DKIM TXT record, in CP click the Verify TXT Record button to ensure that the new DKIM record is publicly available in DNS and is correct. If validation fails, then an appropriate error message is displayed to help you correct the problem. After DKIM is enabled, all new outgoing email messages are signed using your new DKIM key. You can repeat the DKIM enabling process on other supported domains.
Once this completes successfully, DKIM signing will be set up on the outbound mail for the domain.
E) STEP 5 - Maintenance:
There now is the ongoing task of checking the XML file (delivered in an email every day) and entering any new authorized servers in the SPF record.
Checks:
-
- You need to read the xml records which will be coming to you in order to understand if you need to add servers to the SPF record in the DNS for that domain.
- Go here and follow the directions once you have received a report to review: https://cauldron.dmarcian.com/dmarc-xml/
- Use this DMARK Creation Wizzard to check if the work outlined above was done correctly.
- Use mail-tester to see how you're progressing with improving the spammyness of an email.
- You need to read the xml records which will be coming to you in order to understand if you need to add servers to the SPF record in the DNS for that domain.
More Information:
- https://dmarc.org/resources/
- https://support.rackspace.com/how-to/enable-dkim-in-the-cloud-office-control-panel/
- MailJet DKIM Instructions
- MailJet Instructions for GD Specifically
- Information from MailChimp
- How Can I Tell Who is Using DMARC?
- Domain Names - Implementation and Specifications
- Be sure to check out all our tools. Click here.